Getting Started with Dataverse Plugins - Part 3
- May 3
- 9 min read
In the last two instalments of ‘Getting Started with Dataverse Plugins’, we ran through installing and configuring the required software, using some of the new commands we’d installed to create the scaffolding (files and folders) for building our plugin and we utilised AI to generate the C# needed for our plugin. We also started using the term ‘assembly’. Today we’ll start to see where terms like ‘assembly’ and ‘step’ tie into our process. We’ll also talk about the ‘pipeline’.
If you haven’t already read the first and second parts of this series, start with those, so you’re then able to follow the next steps in this blog:
The main aim of this instalment will be to get what we’ve created into Dataverse. This instalment may move at a slightly faster pace than our previous two, as there is quite a bit of ground to cover. I’ll aim to keep explanations brief and only give them where necessary at this point, just so this isn’t an incredibly long read.
The first thing we’re going to do here is run a ‘build’ against our code, this is the moment of truth to find out if we have any errors in there. Inside Visual Studio Code, open your project (if not already open). There is a section in part two of this series, which covers how to open a project in Visual Studio Code. Now, we have a couple of ways to run a build so, go to the ‘Terminal’ option at the top of the screen and here you can either open a new terminal from here, ensure your terminal is pointing at your project folder and then run the ‘dotnet build’ command. Our second way of doing the build is, rather than opening a new terminal, you can select the ‘Run Build Task…’ option on the same menu as the new terminal window option. Both are different routes of doing the same thing. If all goes well, you should see a successful build.

If we’re error free, then we’re ready to get this into Dataverse. If errors do occur, then you can always paste the error back into the AI conversation that generated the original code and that will help you diagnose and correct the problem.
Our next step is installing the Plugin Registration Tool. You might have already performed this install when going through the setup in the first instalment. Conveniently, however, both launching and installing the Plugin Registration Tool is done via the same command. Using a terminal, run ‘pac tool prt’. If you haven’t installed the tool already, it will run the install and launch, otherwise, it will just launch.

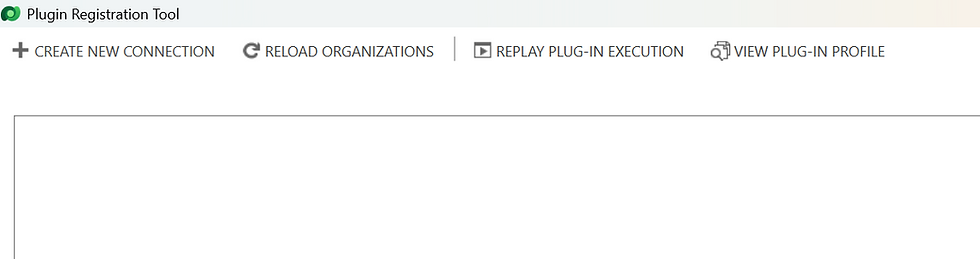
The Plugin Registration Tool is what we’ll use get our project into Dataverse. So, the next step after install, is of course to connect from the Plugin Registration Tool to Dataverse. Click ‘Create New Connection’ at the top of the Plugin Registration Tool. On the screen that pops up, avoid ‘Sign in as current user’, even if that seems like the logical option, and instead select ‘Display list of available organizations’.
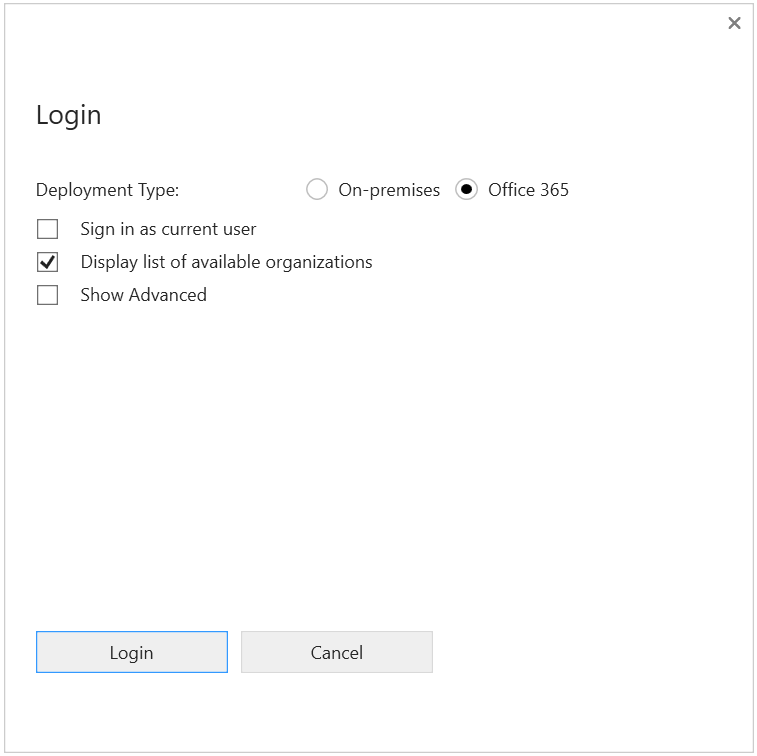
Follow the sign in process, selecting the environment in which you’re undertaking your development, as this is the one the Plugin Registration Tool will connect to.

What you should now see is a list of assemblies that are already present within your environment.
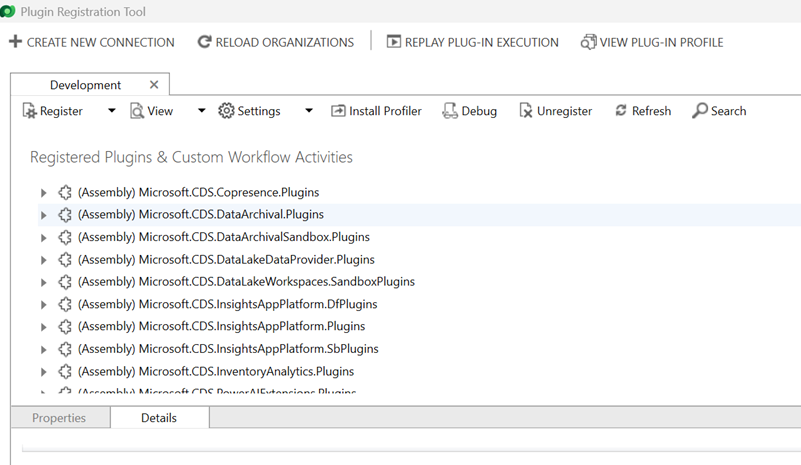
Our next step will be to add an assembly to the list we now see, but first, let’s just take a second, as this is where we can start being a bit more prescriptive about the terminology we’re using. So, the project we have worked on so far, will be the ‘assembly’. In my case, the assembly is the ‘Self Development Tracker’. Within this folder structure, we renamed a file to be called ‘DevelopmentGoalDateValidationPlugin.cs’ and added code to it, this file is our ‘plugin’, and you will see this appear below our assembly, when it’s loaded into Dataverse. New c# files we create for different purposes will each be plugins. Then we have the level below the plugin called the ‘step’, you can think of the step similar to a Power Automate trigger, this gives the details of when and what plugin should be triggered. So, a step will jump in when a record is created in a specific table to call a specific plugin. There are levels below the step, such as pre-images, but we won’t cover those here, we will look more at pre-images in the next and final instalment in this series.
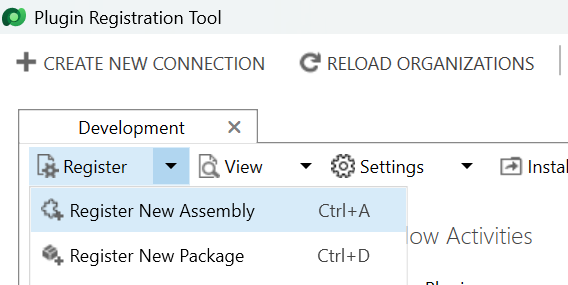
Now, time to add in our assembly. Click the drop down next to ‘Register’ and select ‘Register New Assembly’.
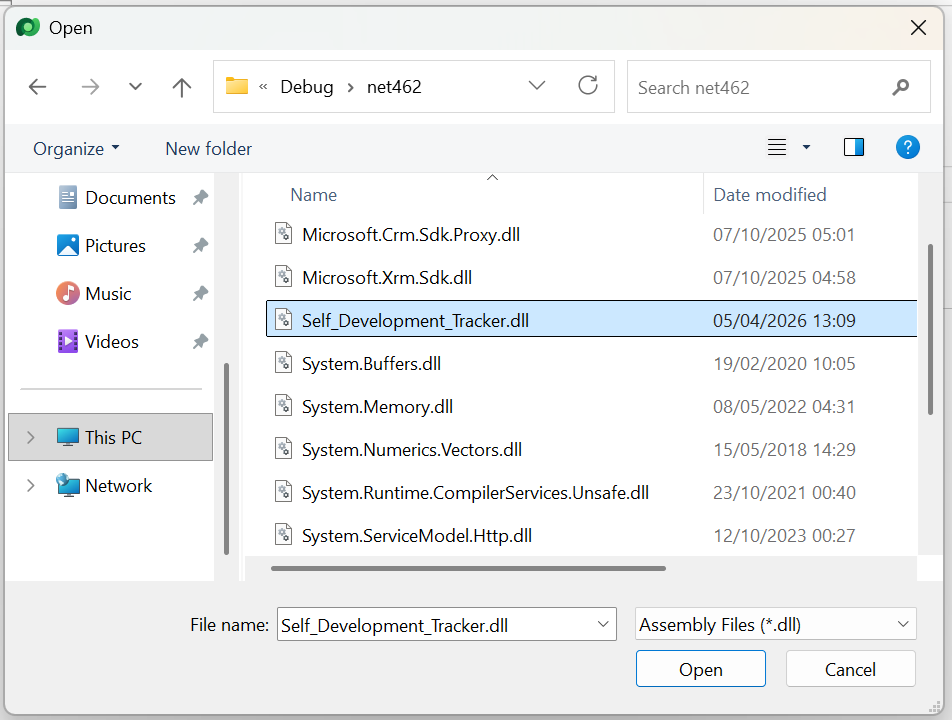
In the ‘Register New Assembly’ screen, start by clicking on the ellipsis (triple dots) next to the text box for step one, and navigate to your project .dll file. This will be under your project at: ‘/bin/Debug/net462/’ and will be called the same as your project, with .dll at the end. If your project name has spaces, then these will be replaced by underscores in the project name.
Once you’ve added in your projects .dll file, ensure the following:
The assembly and plugin are both selected in step two,
Step three is set to ‘Sandbox’,
Step four is set to ‘Database’.
We’ll ignore step five in our simple example. Finally, click ‘Register Selected Plugins’.

Your assembly and plugin are now registered and we’re ready to create the steps.

It’s useful at this point, just to have a look at our new assembly and plugin in the list of existing ones within the Plugin Registration Tool, so we can see things start to take shape.

Now we register our steps, and this is where we’ll need to do a few explainers for some of the options we’re going to update. Begin this part by right clicking on your plugin in the Plugin Registration Tool list and selecting ‘Register New Step’.

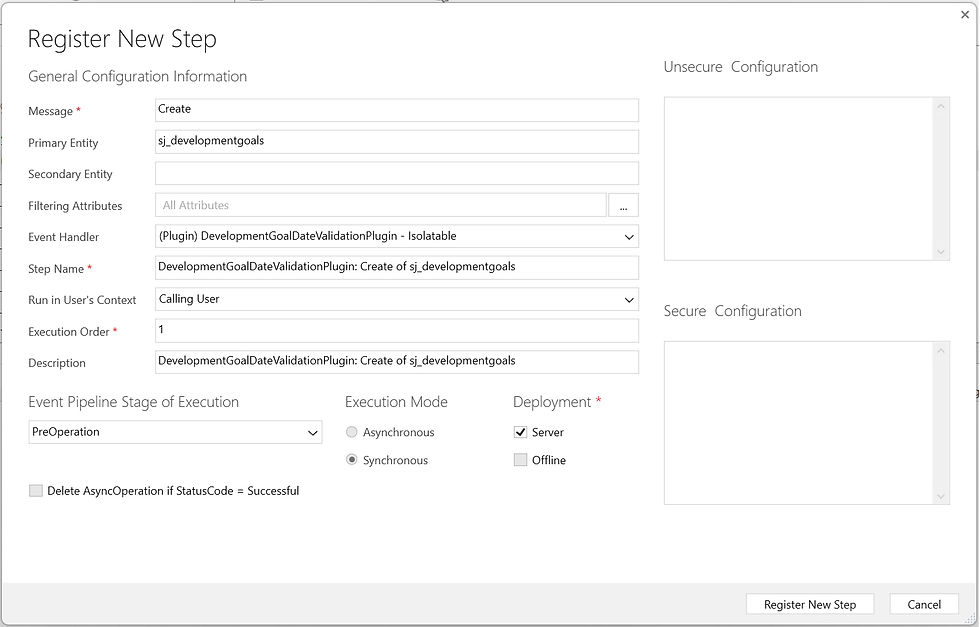
We need to create two steps, each one will run our plugin on a different ‘event’. In this first step, it will run the plugin when a record is created. So, in the message field, which is where we specify the event on which to run, begin typing ‘create’ and then select it from the list which appears.
In the ‘Primary Entity’ field, enter the logical name of the Dataverse table your plugin should run against.
We’ll skip over ‘Filtering Attributes’ in this step setup, as it’s not something we need here, but we’ll look more at that when we set up our second step, and it will then become clearer why we skip over it here.
Our ‘Event Handler’ should be populated with the name of the plugin we right clicked on for creating this step. A few of the fields below this will be auto populated and their values should be fine as they are. The settings that now need a little explanation are ‘Event Pipeline Stage of Execution’ and ‘Execution Mode’, both of these options relate to when our plugin will run. We’ve previously mentioned the ‘pipeline’ and these fields determine which pipeline we use and at what point things run in that pipeline. Let’s look at a very basic breakdown of this and at when our plugin runs:
Execution Mode (Which pipeline) | Event Pipeline Stage of Execution (Point in the pipeline) | When this runs |
Synchronous | Pre-validation | The user clicks save and the plugin runs before standard validation of the record takes place. The plugin can prevent the record being saved. |
Synchronous | Pre-operation | The user clicks save, the standard validation of the record data takes place and then the plugin runs, before the record is created. The plugin can prevent the record being saved. |
Synchronous | Post-operation | The user clicks save, the standard validation takes place, the record is created and then the plugin runs. The plugin will complete its actions before the save completes and it’s still possible at this point to prevent the save of the record from taking place. |
Asynchronous | Post-operation | The plugin runs after the save is completed. So, the record would save, and then the plugin would run some time after. Due to this, it cannot prevent the save. |
It’s important to think at what point your plugin should run and select the right options. If I want to do some form of validation, such as in this example plugin, then it’s better to do that pre-validation or pre-operation. In our case pre-operation makes sense, so the initial validation can make sure everything that needs to be completed has been and it has been completed in the right way, then our plugin can jump in and do the further validation on dates.
If you want the plugin to go off and do something like update a record or create a record in another table, based on a record that you have just created in this table, then you might use asynchronous and post-operation. The reasons being that firstly you can be sure this record has been successfully saved before it goes off and creates related records, and secondly so the user is not waiting too long for the save process to complete. Remember, everything that happens when synchronous is selected, happens between the user clicking save and the save completing, the more the plugin does, the longer that process takes. One final point on this is, if asynchronous sounds like the better option, consider if Power Automate might be an easier choice, as this can also run after the record is saved and might be easier to maintain if the team around you are not familiar with plugins.
For now, set the two fields discussed above appropriately and select ‘Register New Step’.
You will likely see the below warning, don’t worry about that here, we’ll cover what that is when we create the next step, you can ignore it in this step.

That is our ‘create’ step set up complete. Now we need to set up a separate step for when records are updated. In this step, much of what we did in our first step will be the same, so you can repeat the steps above, but there will be one key difference and that is the first field should be set to ‘Update’ rather than ‘Create, as this step targets the update event rather than the create event.
Now, one thing I’ve not done here, but it is useful in update steps, is to complete the ‘Filtering Attributes’ field. This is an important one for the performance of your plugins. This setting tells the plugin to only run when certain attributes have been updated. So, if our plugin on really works with two or three fields in the table, it only needs to run when they’ve been updated. If those fields haven’t been updated, then the plugin doesn’t need to run. What you can do here is click on the ellipsis next to ‘Filtering Attributes’, unselect all the fields and select only the ones we want to trigger the plugin. If you recall the warning we saw at the end of creating step one, this was to tell us we hadn’t set any filtering attributes, so may impact performance. However, the setting didn’t really apply in this case, so could be left blank.

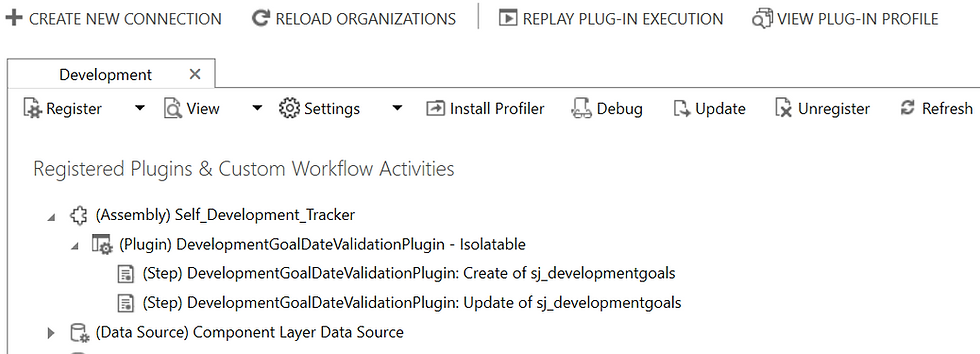
And there we have it, both steps registered and our plugin is ready for a test. You can also now see our hierarchy in the Plugin Registration Tool, showing the assembly, plugin and both steps:
This brings us to the end of the basics for creating a plugin. Here we’ve:
Run a build on our project,
Installed/launched the Plugin Registration Tool,
Connected the Plugin Registration Tool to our development environment,
Added an assembly, plugin and two steps.
In the next and final instalment in this series, we’ll have a quick look at a few useful additions, such as adding plugins into solutions (they don’t add automatically), updating our plugin, creating pre-images, activating debugging and deleting a plugin.


Comments